Bootstrap Checkbox Switch
Introduction
Sometimes the elementary things might probably become really important-- specifically each time you come to need them. For example just how do your visitors connect with the pages you make stating a basic Boolean act-- simply yes or no pertaining to some of the thoughts you have to ask, just how they do confirm the terms or line up a few of the attainable choices they might have. We most likely get past this without paying enough of an recognition to the feature liable for such activities but the Bootstrap Checkbox Button is really a very critical feature-- one our forms cannot really do without.
In current fourth version of the Bootstrap platform we are provided with the
.form-check.form-check-label<div>.form-check.form-check-label<label><input>.form-check-inputHow to utilize the Bootstrap checkbox:
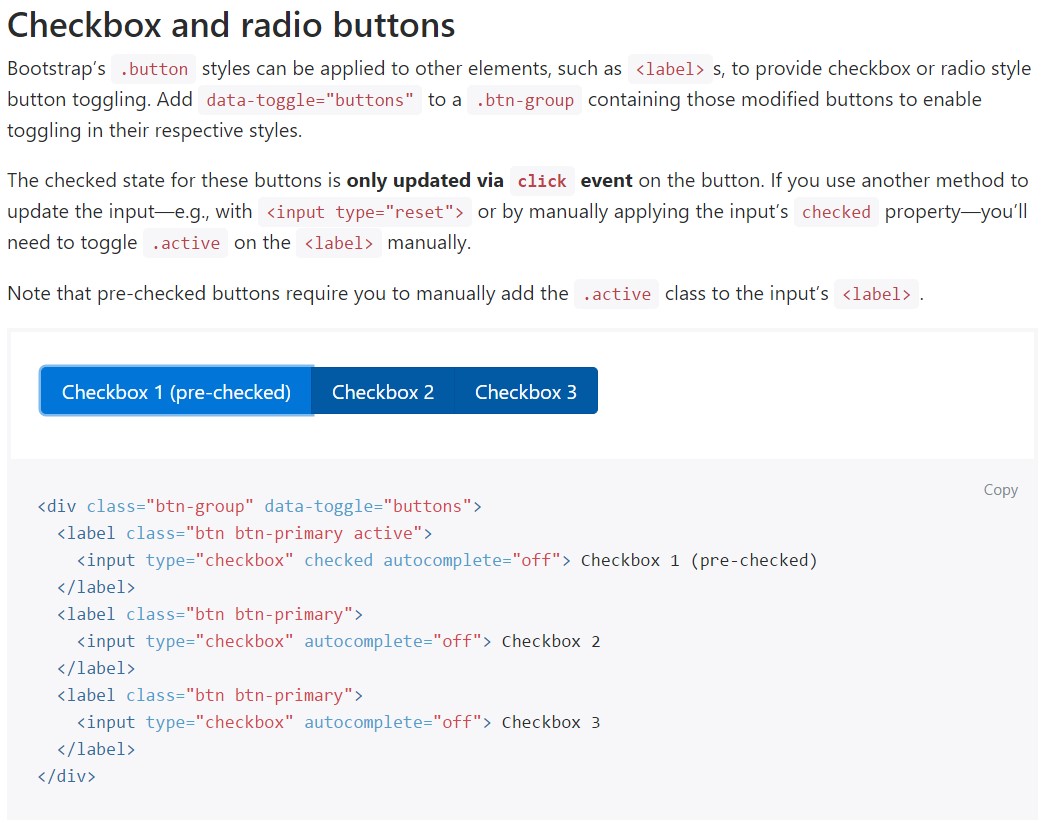
The checked condition for such buttons is only upgraded by using click event on the button. If you put to use another solution to upgrade the input-- e.g., with
<input type="reset">.active<label>
<div class="btn-group" data-toggle="buttons">
  <label class="btn btn-primary active">
    <input type="checkbox" checked autocomplete="off"> Checkbox 1 (pre-checked)
  </label>
  <label class="btn btn-primary">
    <input type="checkbox" autocomplete="off"> Checkbox 2
  </label>
  <label class="btn btn-primary">
    <input type="checkbox" autocomplete="off"> Checkbox 3
  </label>
</div>
In certain cases we want the checkboxes to be in our forms without the site visitor truly can have any practice selecting them-- that is generally where exactly the disabled option appears in.
In order to disable properly a checkbox in Bootstrap 4 applying the typical HTML attribute
disabledIf you appreciate the idea and really desire to accomplish this you should appoint the
.disabled.form-checkSome other scenario
Anytime applying checkboxes, wrap all of them in a
<label>.custom-control.custom-checkboxWork with
.custom-control-input<input>As well utilize two
<span>.custom-control-indicator.custom-control-description
<label class="custom-control custom-checkbox">
<input type="checkbox" class="custom-control-input">
<span class="custom-control-indicator"></span>
<span class="custom-control-description">Boots</span>
</label>
Bootstrap Checkbox State forms
Default checkboxes and radios are greatly enhanced upon with the help of
.form-checkDisabled checkboxes and radios are provided, still, to supply a
not-allowed<label>.disabled.form-checkA brand new element for the Bootstrap edition 4 system is the arrival of the so called custom-made form elements. These are the same features we are known inside practicality however designated even more eye-catching and also in the Bootstrap means. By using them you can surely bring in certain spice and personality to your information via just appointing a handful of special classes to the controls you include in your forms.
In order to apply customized checkboxes wrap them within a
<label>.custom-control.custom-checkbox<input>.custom-control-input<span>.custom-control-indicator.custom-control-descriptionConclusions
That's practically everything you must do in order to insert a checkbox feature in your Bootstrap 4 powered site and add a number of custom-made flavor to it including it a fancy appearances. Currently everything you ought to do is repeat the exercise unless you have actually examined all of the checkboxes wanted are currently on the page.
Review some video clip tutorials relating to Bootstrap checkbox
Linked topics:
Bootstrap checkbox formal records
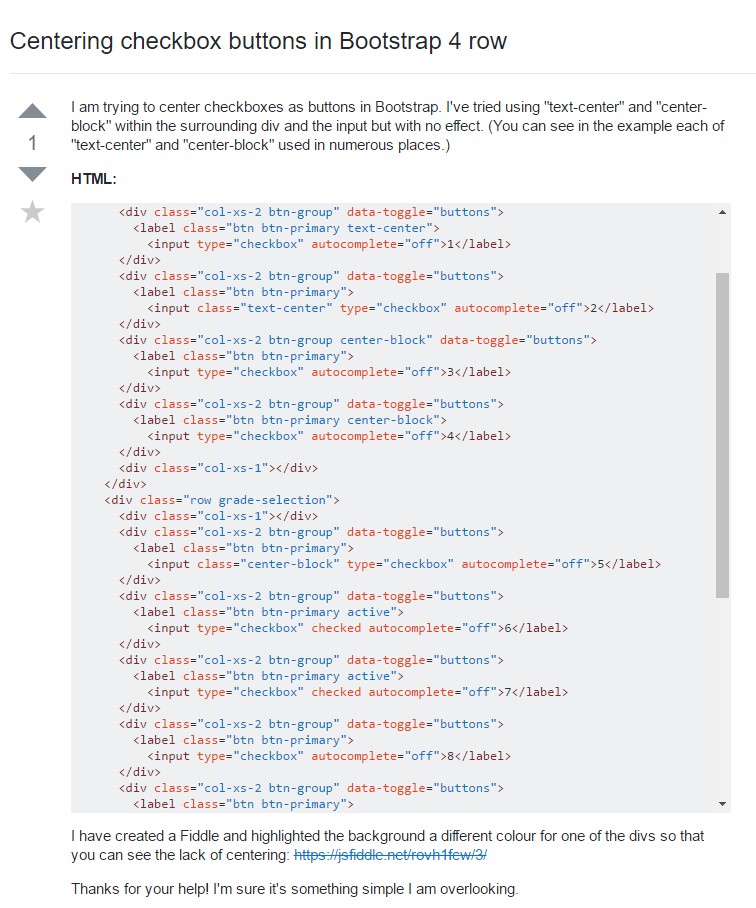
Centering checkbox buttons in Bootstrap 4 row
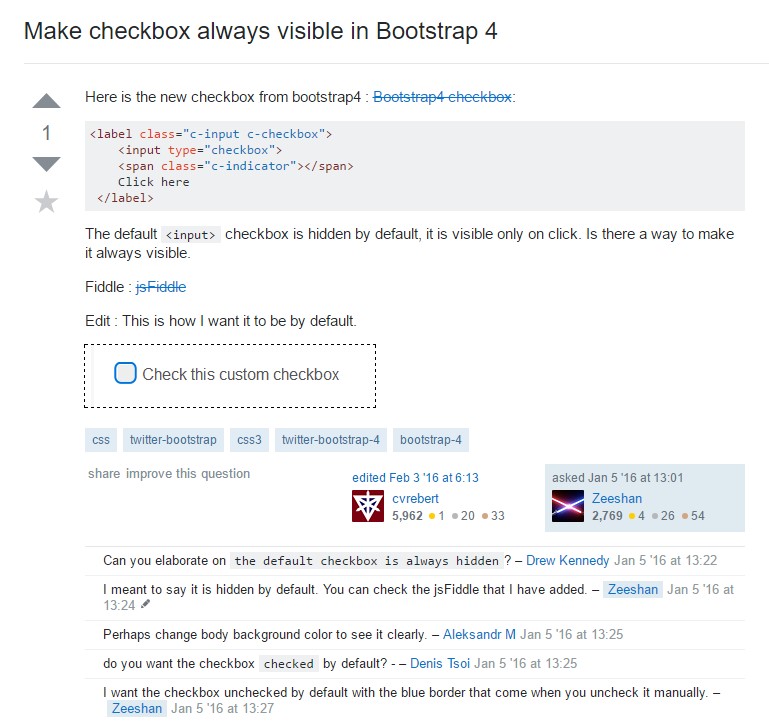
Make checkbox always visible in Bootstrap 4